Remote Start a Honda Generator
Scenario:
You have a high altitude remote communications site. It is the middle of winter. Access to
the site is almost impossible. Your wind turbine is a ball of ice and does not turn. Your
solar panels have not seen any direct sunlight for weeks. Your battery bank is dangerously
low. What do you do?


When your batteries need a boost to bring them back to full charge, a generator and a high
amperage battery charger are the things you need! With our remote monitoring systems you
can use the heavy duty on-board relays to remote start and stop a generator at anytime
using an Internet connection from home or at the office!
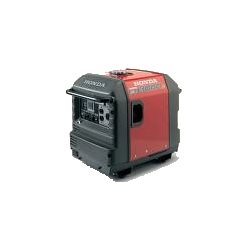
For this remote monitoring and control project we chose the Honda eu-3000-is generator for
its quiet operation, fuel efficiency, and electric start capability. It does have one draw
back, the generator is not equipped with an automatic choke. We overcame this drawback with
a door lock solenoid to actuate the choke mechanism. The solenoid was purchased from the
local auto parts store.
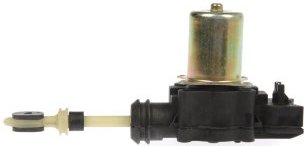
The small factory fuel tank was removed leaving plenty of room to mount our choke solenoid.
The solenoid is mounted in a convenient spot in the engine compartment that allows it to
actuate the choke lever smoothly. Metal suspension strapping was used to secure the
solenoid in place. The factory choke cable is removed.

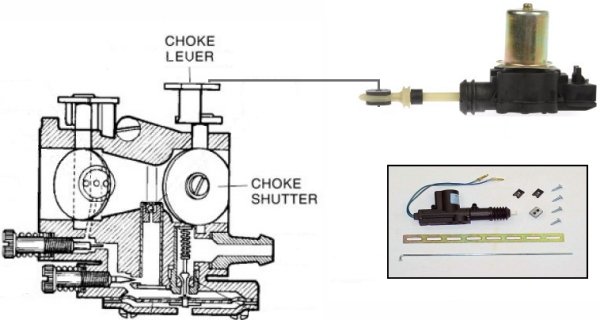
Below is a diagram illustrating how the solenoid attaches to the carberator with a steel
rod. The 12 volt solenoid is powered from the generator's 12 volt battery. The solenoid
power wire is routed through one of the on-board relays on the remote site monitoring
board. The ground wire on the solenoid was run directly to the generator's negative battery
post. When the relay is energized, the solenoid closes the choke allowing the engine to
start easily when cold. A return spring was added to assist the choke solenoid in opening
the choke fully when the relay is de-energized.
Next we disassembled the front panel of the generator to get at the key start circuitry.
The start switch has four wires that plug into it. With the wiring schematic in the manual,
we were able to ascertain that two of the wires that attached to the start switch were for
the starter, the other two wires are used to stop (kill) the engine. Touching the two
starter wires together causes the starter to engage, the generator fires up. Touching the
two stop wires together, stops (kills) the generator.
The starter switch has a plastic plug connector that when separated, allows us to attach
wires to it with ordinary automotive spade connectors. We ran the two starter wires to the
large power relay (relay 3) on the RMS board. One starter wire we attached to the COM
terminal, the other starter wire we attached to the NO (normally open) terminal. The two
engine stop (kill) wires we ran out to one of the smaller power relays (relay 1) on the RMS
board. One kill wire we attached to the COM terminal, the other kill wire we attached to
the NC (normally closed) terminal. Relay 2 on the RMS board is used to actuate the choke.
Connecting the RMS remote monitoring and control board to a laptop computer, we are able to
start and stop the generator at will. So far, so good. To have indication that the
generator is running when deployed at a remote location, we used an AC/DC adapter plugged
in to one of the generator's AC outlets. The DC wires are run to one of the RMS voltmeters.
When a steady voltage shows up on the voltmeter, the generator is running.

Next we must modify the exhaust outlet to vent the exhaust fumes outside our equipment
shack. The picture below shows how common metal heat ducting is used to create an exhaust
pipe. The custom exhaust pipe is riveted to the generator housing. High temperature sealant
is used to seal the seam where the custom exhaust pipe meets the generator housing. On the
exterior of the building, a metal vent with flap is used to keep rodents and cold air from
entering the building when the generator is not running.


The factory fuel tank on the generator is much too small for any kind of prolonged use, so
a larger steel fuel tank was obtained. A fuel filter and shut-off ball valve were added to
the large tank. A large capacity fuel tank will allow us to charge our batteries often
enough to last all winter.

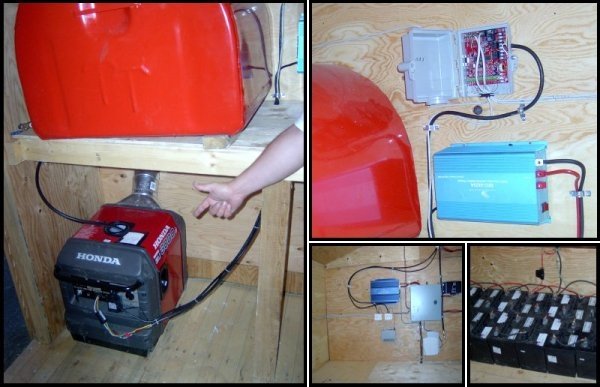
Below are some pictures of our equipment building on Holmes Mountain with the RMS unit and
Honda generator installed. The 24v battery bank is charged by a Samlex 24v charger powered
by the Honda generator. The Honda generator is controlled by the RMS remote site monitoring
board. An ordinary 12v AC/DC wall adapter is run to one of the RMS voltmeters so we can
tell when the generator is running. This relay project worked exceptionally well! We are
able to monitor our battery voltage, temperature, entrance door, and remote start our
generator from the comfort of home!
Our Story
EtherTek Circuits started its business in 2001. Ever since we have provided remote monitoring and control solutions for Remote Tower Sites, the Oil & Gas industry, Telemetry systems for Agriculture, Municipalities, Mines, Solar Farms, Hydro Plants, and the Military.


